Adding an App
Adding an app to RefundShield is a two-part process: first you register the app with its App Store Connect credentials, then you point Apple's notification system at your unique webhook URL. This article walks you through the registration form, the next two articles cover each supporting step in detail.
Fill in the App Form
- Go to Apps in the main navigation
- Click Add New App
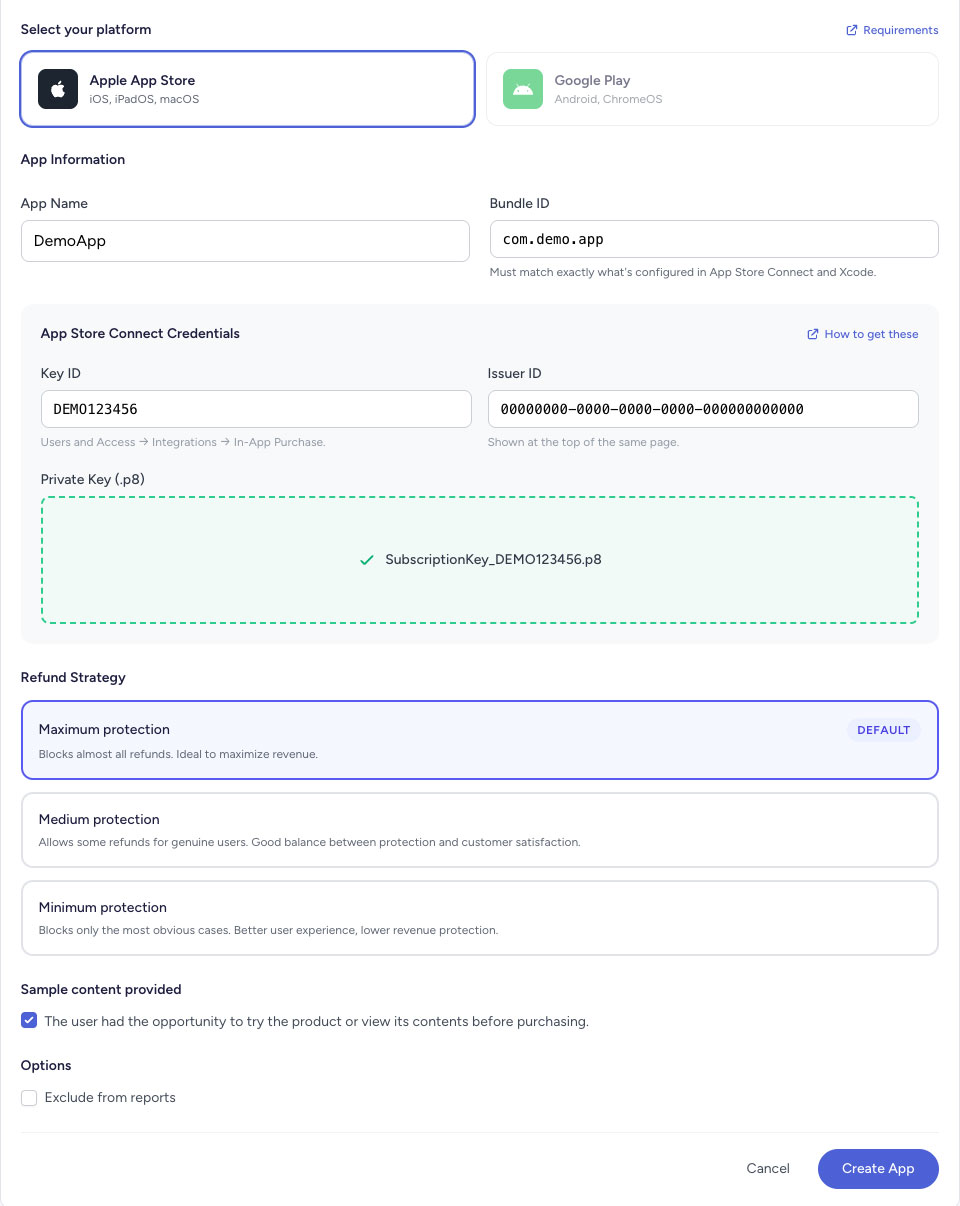
- Fill in the form:
- App Name: a friendly label for your reference
- Bundle ID: must match exactly (e.g.,
com.yourcompany.yourapp) - Apple Key ID, Issuer ID, and Private Key (.p8): see App Store Connect Credentials if you haven't generated these yet
- Choose a Protection Preset (Maximum, Medium, or Minimum)
- Click Save
Next: Configure Your Webhook
Once saved, RefundShield generates a unique Webhook URL for your app. You need to paste this into App Store Connect so Apple forwards refund events to RefundShield, without this step, your dashboard will stay empty. Continue to Configure Your Webhook URL.
Multiple Apps
A single App Store Connect API key (.p8) works for all your apps under the same account, you can reuse the same Key ID, Issuer ID, and private key for every app. Each app still gets its own webhook URL and protection preset.
You can add as many apps as you need. Your plan's limit applies to the total monthly refund volume across all your apps combined.